Google Analytics is a really useful tool for any webpage owner who seeks to know information about it’s usage. Analytics lets you know things such as which pages are the most visited, when are they visited and for how long, how did the users find your page, which are the peak hours, or even their behaviour inside your web. It’s installation is rather simple and the data can help you greatly to improve your webpage, as well as letting you know which are the sources of your traffic and new users, which can help you know which advertising is being more effective. This tutorial will show you how to install it.
Here are the steps for linking Google analytics to your web
1. In order to install Google Analytics, first of all, you need to sign in. As it’s a google service you can do so with any mail account you have.
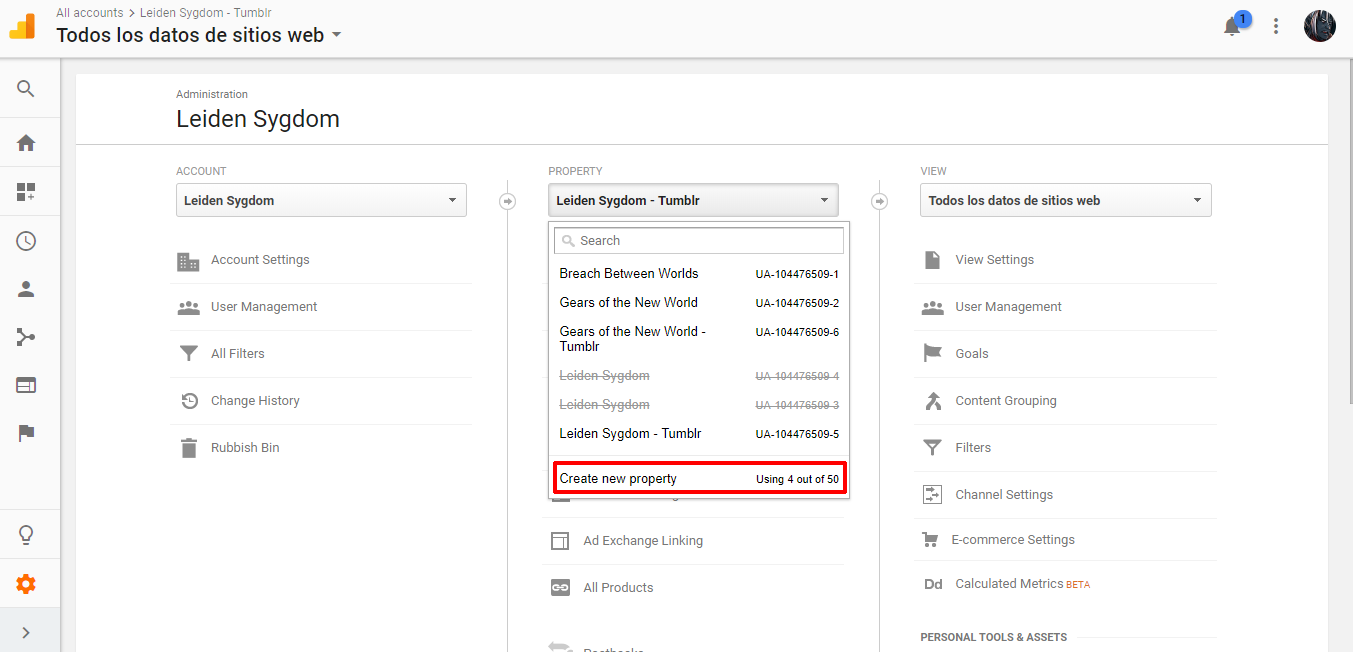
2. The second step is to create a new property. In order to do so you need to click on the gear icon in the left sidebar, and select “Create new property” in the drop down menu. In this menu you will be able to see any other properties you have and access them, too.
3. You will need to fill in some information once you click on creating new property. Make sure to put the correct timezone so you can see the data adapted to your own hours, as well as writing correctly your website’s name, along with the other requested information. This is the screen you should see:
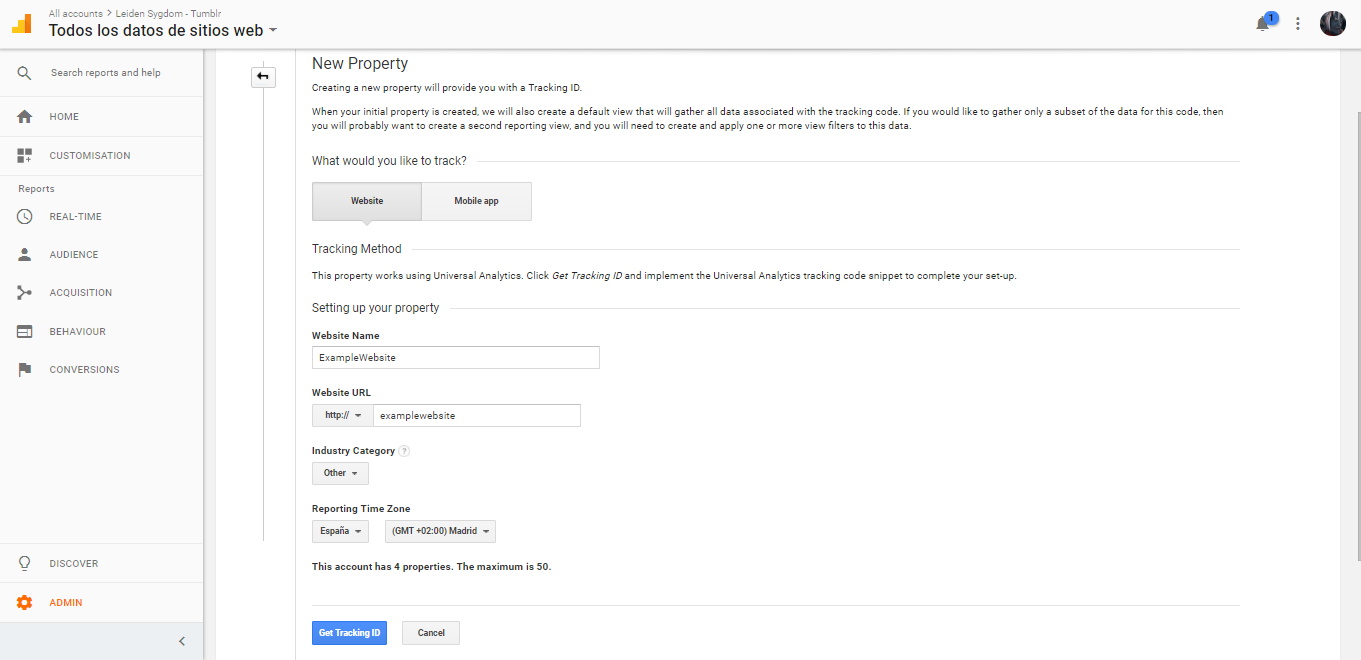
Once you’re done, click on “Get Tracking ID”
4. Once you click Get Tracking ID, you will get two things: The tracking ID, which is the property name and the way Google will identify your webpage, and the global site tag:
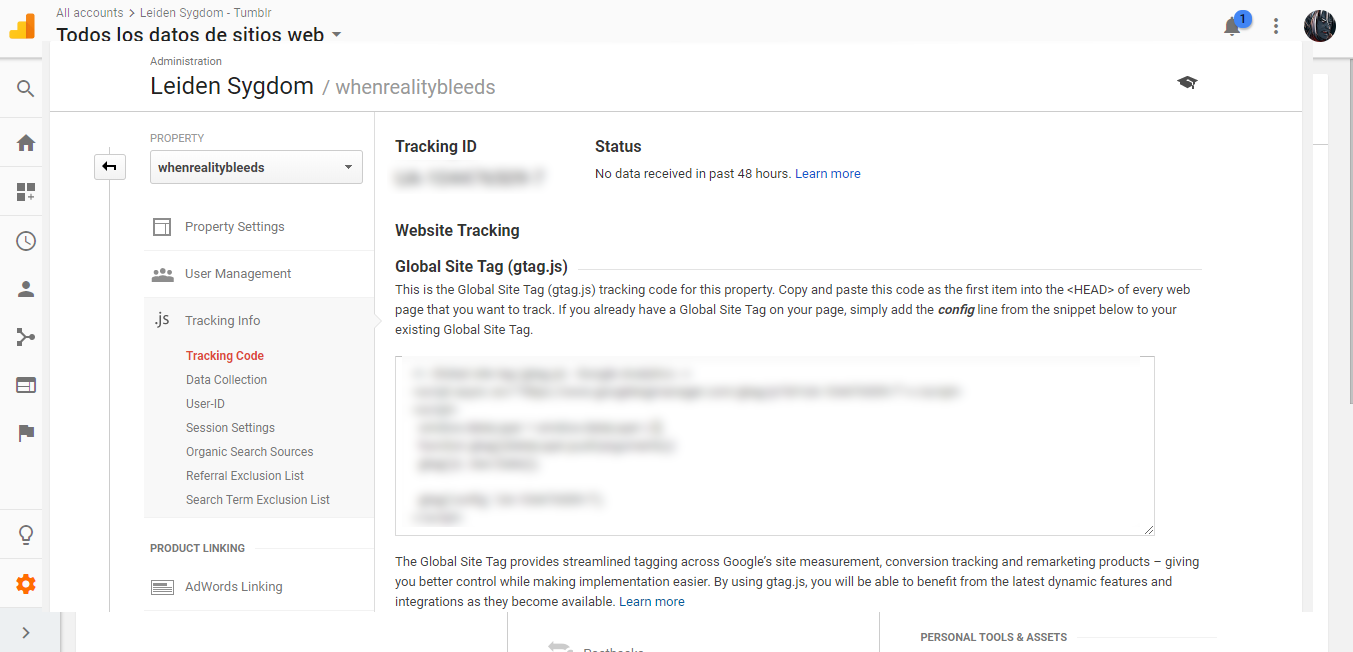
The Tracking ID can be enough if you are using a webpage that is already prepared for it. This is an example (from foroactivo.com) of a page that will just ask you for the tracking ID:

This might not always be the case, however. If you can’t use the Tracking ID, you will need to use the Global site tag. This is a code you will need to place in your webpage’s code, in the first part of the head, such as in here.
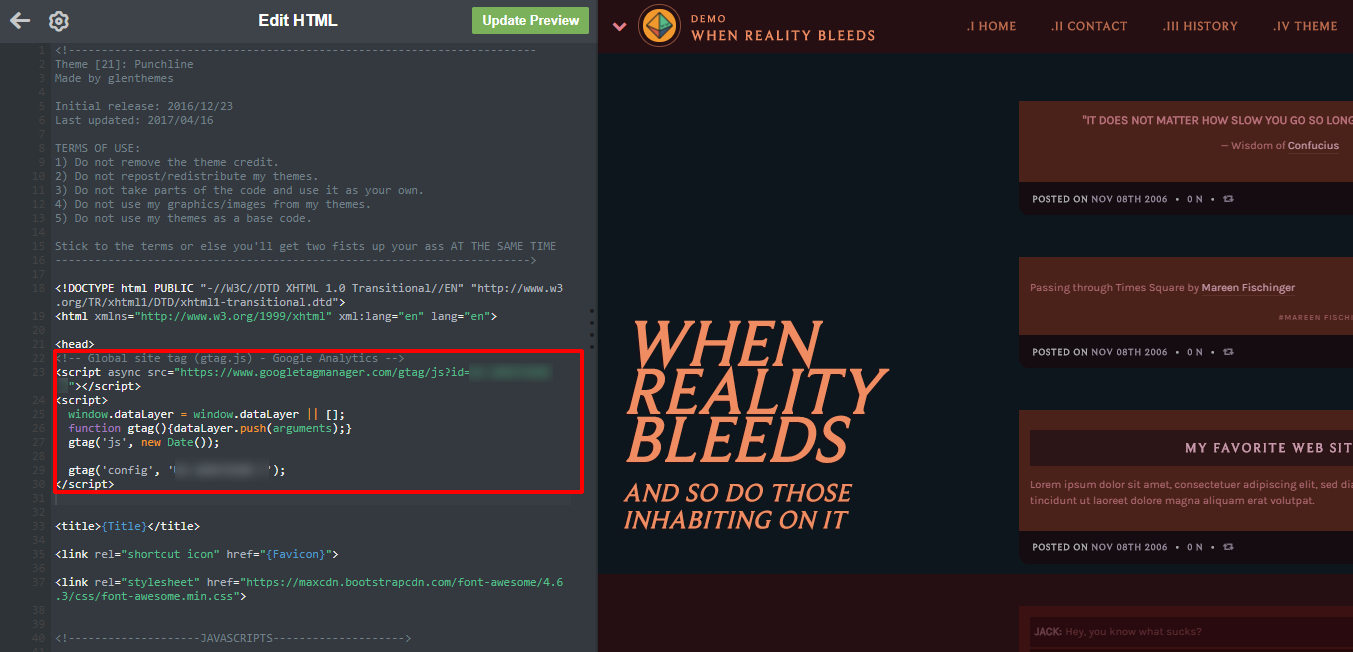
For this example I’m inserting the code into a tumblr page, which allows you to edit the full html and css. Once you have done this, save your html.
5. After doing this we just need to test if you have linked your google analytics correctly to your webpage. This is what you should see, immediately after refreshing the page:
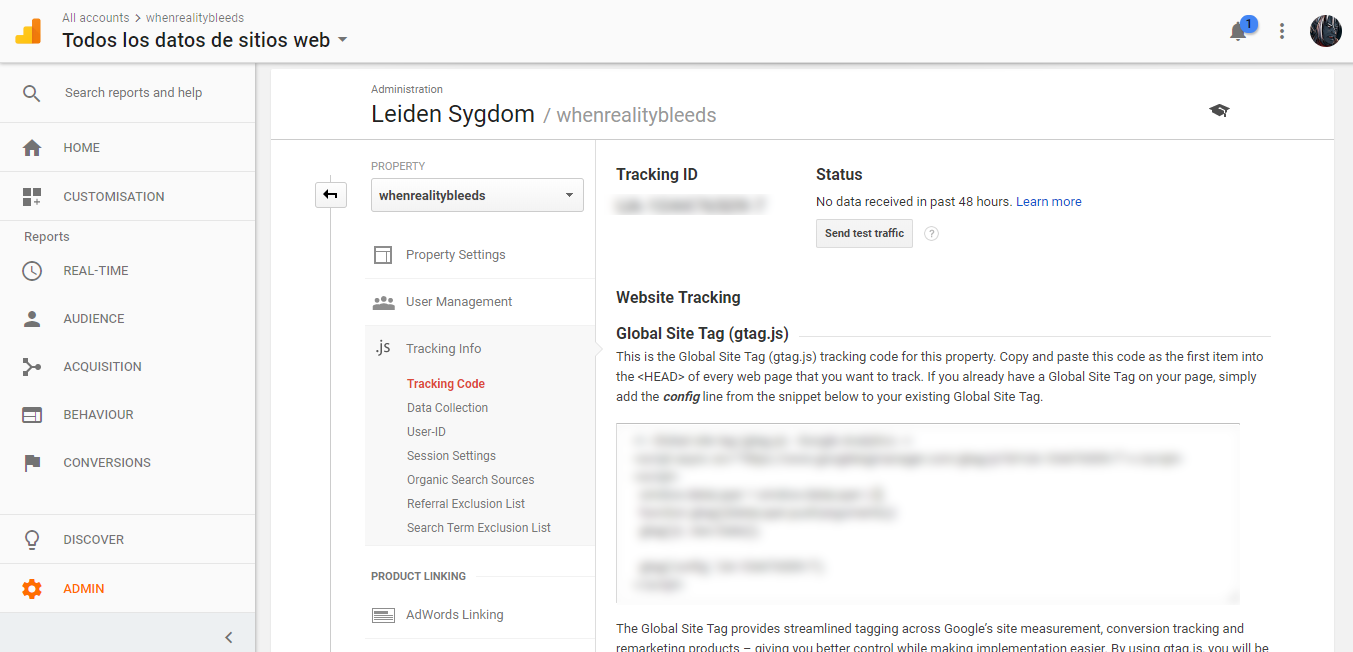 You will need to click on “Send test traffic” under Status to check if it’s working. Make sure to disable any possible extensions that might block tracking, such as Ghostery. Wait around one minute after you clicked on Send test Traffic and refresh the page. If you followed this tutorial correctly, you should see this:
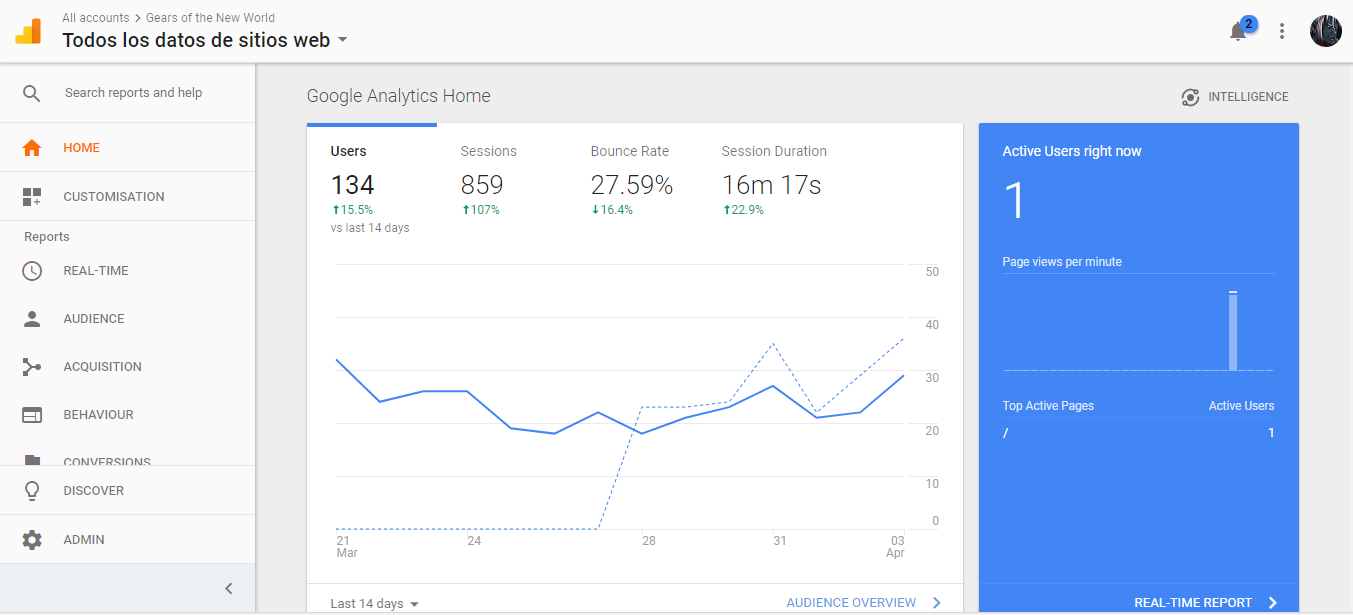
 If you have arrived to this step, you have successfully installed Google Analytics in your webpage! Now you can start viewing your users behaviour. It might take a while until it has enough data to start working, but once some time has passed, it should look like this:
Thanks for reading!

