WordPress is a very useful tool to create webpages but what happens when we are working on a computer with our WordPress and we need to do it on another one? Here you can find the solution!
EXPORT
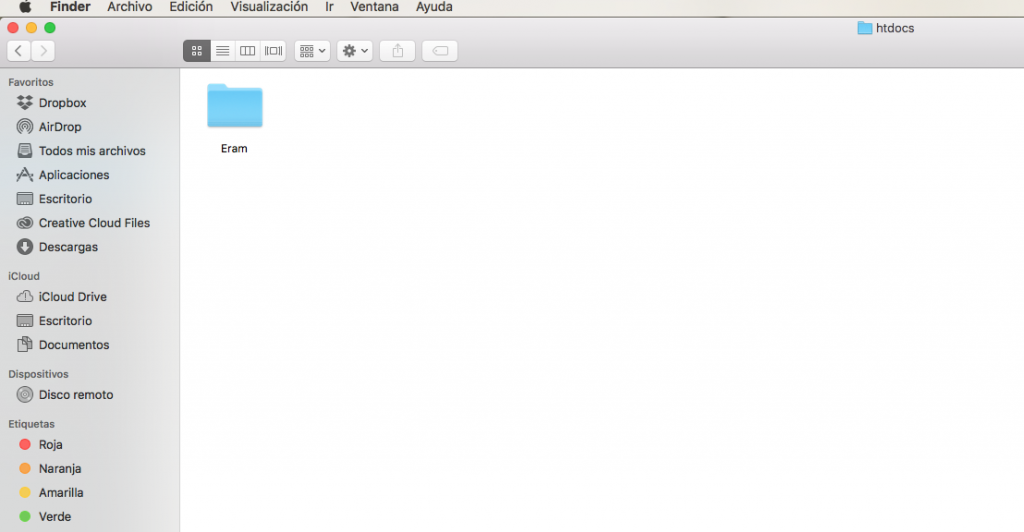
1.- First you have to open your htdocs folder in MAMP, to enter this folder you have to open Finder, then click applications and inside you have to search for MAMP, double click it and open the htdocs folder. 2.- Once you have opened htdocs folder you have to compress the folder you want to use to work on another computer. This folder later can be pasted in any htdocs folder in any computer with MAMP.
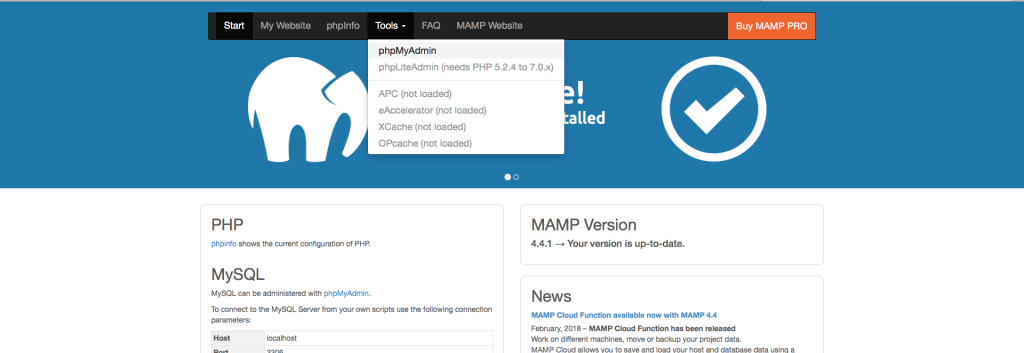
3.- Now you have to open MAMP, start the servers and enter the webpage, inside the webpage you have to click on the top bar on “Tools” and then on “pHpMyAdmin”.

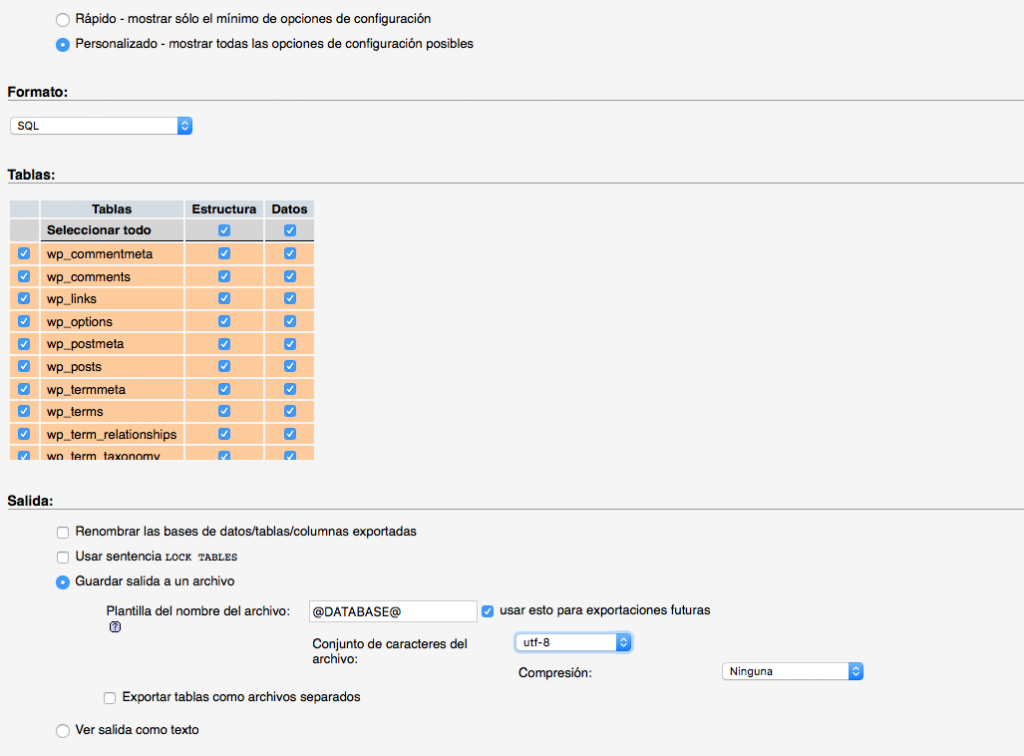
4.- Once you enter pHpMyAdmin you have to click on the top bar on databases, then it will appear a list with your databases and you have to click on the one you want to use on another computer. When you have clicked on it you have to click on export, it’s in the top bar, here you have to change the export mode into personalized and then mark the option “Save file with extension”.

5.- When you have selected all the options you have to scroll down and click continue, a file with an .sql extension will download automatically.
IMPORT
1.- First of all you need the compressed folder and the .sql file. The compressed folder you have to paste it on the htdocs folder on the computer you want to work and decompress it.
2.- Now you have to enter MAMP, start the servers and enter the webpage, once you are in the webpage you have to open pHpMyAdmin.
3.- When you are inside pHpMyAdmin you have to click on databases to create a new one, above the database list there’s a field where you can write, there you have to write the same name of your .sql file and select “utf8_unicode_ci, then you have to click create.

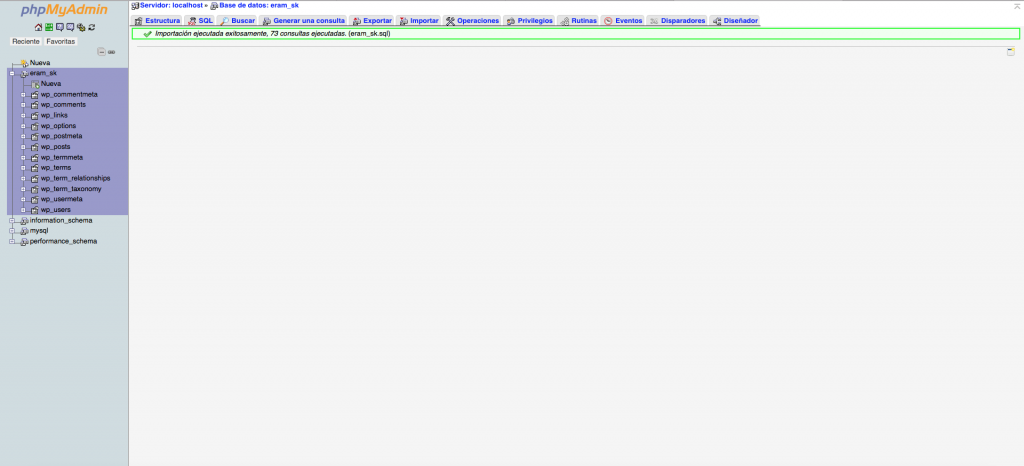
4.- Once you have created the new database you have to click on import in the top bar, there you have to click on “select file”, it will open the finder and there you have to select your previously exported .sql file. When you have selected it you have to scroll down and click on continue, when it appears a green rectangle you have done all succesfully and now you can enter your WordPress on this computer.

